Audio Troubleshooting Basics
Our Audio Troubleshooting Basics page covers some common problems and offers tips on troubleshooting and possible repairs that can be made. Major repairs are not covered – only the audio troubleshooting basics that can help save time and money.
I will only cover a few audio troubleshooting basics examples here – you can find additional tests under our Audio Tests / Measurements Section – CLICK HERE!
Important – Read This
The #1 mistake that technicians make when troubleshooting is starting at the wrong end, and not checking the most obvious first. Always check the simplest, most obvious things first, before you start taking equipment apart. Use common sense when troubleshooting, think first…
The #2 most common mistake that technicians make when troubleshooting (audio tool) is taking apart a piece of equipment that they have no clue about. Inexperienced technicians that have not been trained should never start taking equipment apart. First, it could be dangerous, and second – you could void the Warranty (if there is one). Third, many repair shops won’t work on equipment if they feel someone has already opened it up and worked on it (tampered with the equipment).
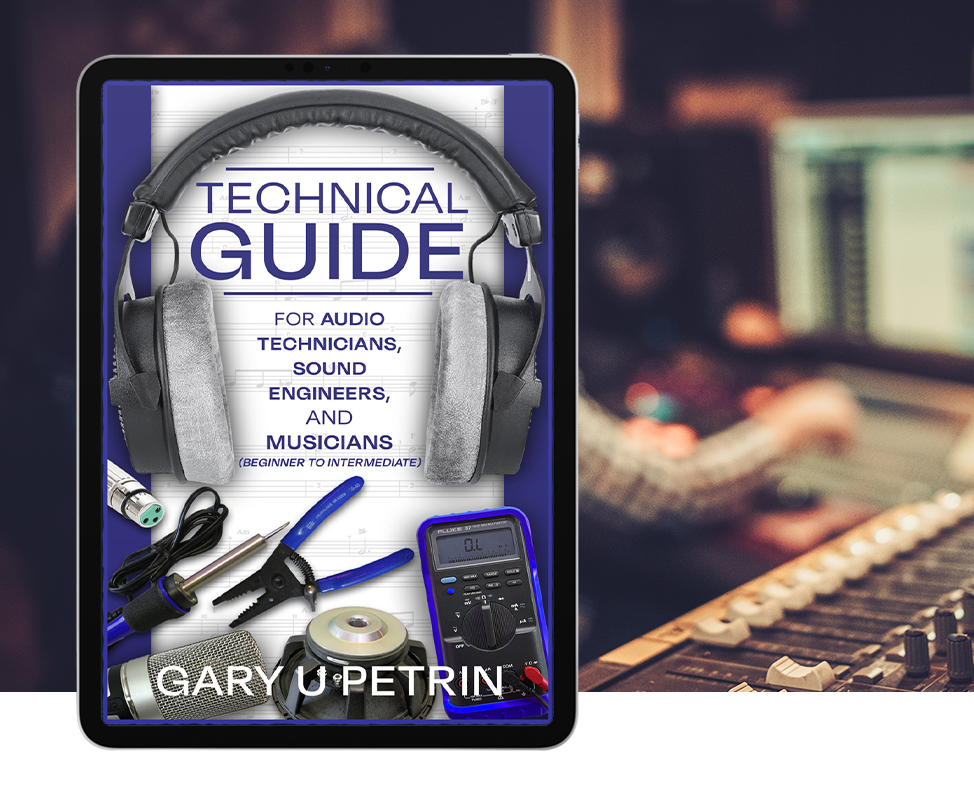 |
CHECK OUT OUR NEW “TECHNICAL” PUBLICATIONS NOW! |
 |
Audio Troubleshooting Tips / Examples
1. Problem: Hum in guitar amplifier / PA system.
Solution:
a) The #1 problem with hum is a “Bad Cable” – Check your guitar cables (and effects cables if you are using any) – use the process of elimination by plugging in “1” cable at a time to see which cable is causing the hum. For a PA – start checking input cables (mic cables – unplug one at a time), then any input and output cables hooked to the mixer, then the Mixer Output with your Mini-Amp (Powered Speaker Test Unit).
b) Second, any AC cables and / or Extension cords should not be “coiled” up on top of each other (they may be plugged into separate circuits, and this could be causing a “ground loop”).
c) Third, the Amplifier could be too close to other AC cables – if you have a “tube” amp, be careful not to get the tubes too close to any other AC cords (this can also be a cause of hum). This is a very common and easy audio troubleshooting problem.
2. Problem: No power to guitar / bass amplifier (no power indication / power light stays off when the on / off switch is turned on).
Solution:
a) First, try plugging your amplifier in another AC outlet (the power outlet could be bad).
b) Second, Check the AC outlet with a Multi-meter (Use caution, set meter to AC volts). USE EXTREME CAUTION WHEN CHECKING AC POWER!
c) Third, unplug the amplifier from the AC outlet (wait 5 minutes), then Check the Fuse. The fuse will sometimes look “blackened” when blown, but not always (check the fuse with a meter – use the ohms scale). * If fuse is bad – replace only with the same fuse rating (if not, you could do more damage to your amplifier).
d) If none of the above works, take the amplifier to a repair shop (there may be internal circuit damage).
3. Problem: Audio is Scratchy / Staticky / Popping noise coming out of the speakers (occurs mostly in PA system amplifiers and mixers, but can occur in guitar / bass amplifiers also). Problem occurs when the volume potentiometer (Pot) is turned up or down.
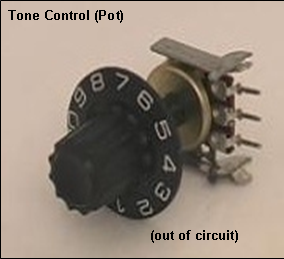
Note: One of the most common problems with “scratchy, static” noise coming out of your speakers is “dirty pots” – tone controls, volume knobs, gain controls, equalizer faders, mixer faders, and pots all tend to attract dirt / dust / finger grease / and grime. The good news is that the procedure to “fix” this problem is fairly easy (most of the time). Be careful not to “underestimate” this problem, it can make your system sound like there is a major problem, but in fact, it’s very common and can be rectified easily.
Solution:
a) Use only an “approved” contact cleaner that is made for audio systems (DeoxIT – D5, made by CAIG is a very good contact cleaner for audio). Cleaning Dirty Pots – Video Clip!
b) It does not matter if the equipment is plugged in or not (equipment can be “on” during cleaning process – this allows you to hear the scratchy sound clearing up).
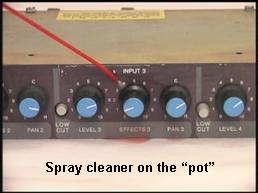
c) Spray the contact cleaner into the “pots” – use a generous amount of cleaner (don’t hold back – soak it down really good).
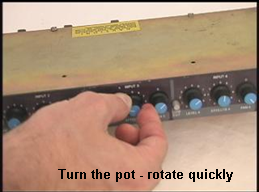
d) Turn the “pot” quickly (back and forth, rotating the pot – working the cleaner in).
e) Repeat the steps in “c and d” as needed until the audio sounds clean (no more scratchy sound in the audio). Repeat cleaning as needed (it may take 3-4 times to clean the pots, don’t give up too soon).
4. Problem: Amplifier Speaker is rattling, speaker does not sound clear, sounds blown?
Solution:
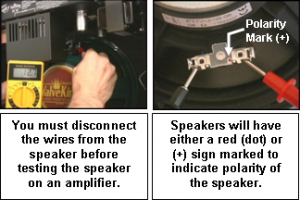
a) With the amplifier turned off, and the AC cable unplugged from the wall – remove the speaker wires from the speaker (usually the wires are red and black). Check the speaker terminals – are they loose, broken, oxidized (check for rust or a green film over the terminals). Testing a Guitar or Bass Amplifier – Video Clip
b) Next check the speaker with a Multi-meter. Set the meter to ohms (200 setting will do), and check the speakers impedance (you can find the speaker impedance on the back of the speaker). You are looking for an “open” or a “short” or even a reading that is too high or too low (example – if you are measuring an 8 ohm speaker and read 2 ohms, there is most like something wrong with the speaker, if you read 6.4 ohms, the speaker is fine).
Audio Troubleshooting – Notes
Audio Troubleshooting basics note – It is important to understand where to start the troubleshooting process – starting at the wrong end (or somewhere in the middle) will take longer and can get confusing – starting directly with the first piece of equipment in the chain, and working your way down the signal flow will help keep the process flowing (allowing faster, more reliable testing). Gaining experience is the key; practice will only make it easier…
If you are troubleshooting a PA system (example being the microphone does not work) – you really need to start with the obvious first. The example below relates to having only one microphone plugged into the mixer.
Microphone does’nt work when plugged into the PA system:
1. Check the microphone / cable first – try a different mic and a different cable if you have one available.
2. Make sure you check the settings on the mixer:
a) Microphone should be plugged into the XLR connector and using the “Mic Level” setting (which is a pre-amp in the mixer).
b) Is this a condenser microphone? If yes, Is the 48V Phantom Power switch on for this channel (most condenser mics need phantom power to work).
3. Try a different channel on the mixer…
4. If you suspect the mixer, make sure you plug something else in to the mixer and play some music, such as your phone or MP3 player to test the mixer. If you get sound out of the PA, it’s not the mixer, amplifier, or speakers.
5. At this point, you need to use a Mini-Amp tester (any powered speaker tester) and start checking inputs and outputs of the mixer and amplifier. Do you have signal at the input of the amplifier – is it a clean, strong signal?
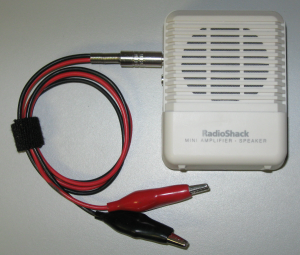
6. If you have signal at the output of the amplifier, but not at the speaker, test the speaker with your multi-meter (using the same principle as shown above – testing a speaker).
Conclusion
Now that you’ve learned some audio troubleshooting basics you need to know that gaining troubleshooting knowledge and skill will come from experience (making mistakes here and there, taking lots of measurements, understanding those measurements, know where to start and finish). Audio Troubleshooting Basics shows you that once you start performing measurements and tests, you will find that the more you do it, the better you get at it. And you will find that there are many simple tests that can be done without having to purchase expensive test equipment. Take it for what it is, audio troubleshooting basics are simple tests you can do yourself so you can save some time, and even a little money.

BASIC AUDIO TEST EQUIPMENT INFO HERE!
