How to Solder XLR Connectors
This menu page will show you how to solder an XLR audio connector below. But the first thing I will stress when it comes to Soldering is to always use “Caution” and follow all “Safety” guidelines and precautions… Always!
Even though soldering looks easy, it really isn’t. Anyone can solder, but not everyone can solder correctly. If you don’t know how to solder correctly, you could get a “Cold” solder joint (which looks like a good connection, but it’s not), the solder can drip and cause a short, you can burn the wires inside the cable jacket, etc. Just like anything else, the more you do it, the more you practice – the better off you will be at it…
Safety – Make it a Priority!
Safety must be made a priority whenever you solder – AVCSS Guitar World cannot be held responsible or liable for any injuries incurred from any soldering method or technique shown in this booklet and DVD.
Always use Caution!
*Safety 1st – Always use the following procedures any time you solder…
a) Do not attempt to solder or use this information if you are a minor (get an adult to supervise you before and during any of the soldering sections).
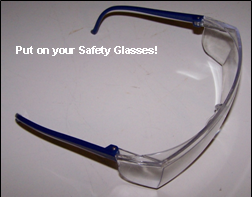
b) Always use Safety Glasses when soldering, protect your eyes and face.
c) Do not “flick” a hot iron around, use a wet sponge to clean the tip of the iron.
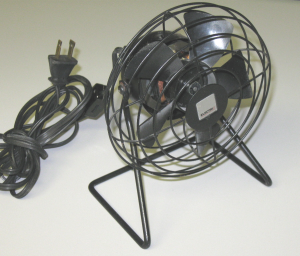
d) Use a fan (see picture) to remove the soldering smoke from your face (do not breathe in soldering smoke – solder usually contains “lead”).
Soldering an Audio Connector
Example using a Female “XLR” Connector
For this example I will demonstrate how to solder a Female “XLR” connector (one half of a standard microphone cable).
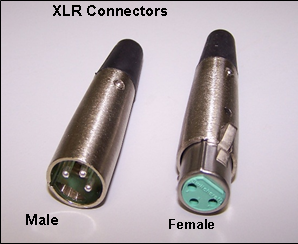
This soldering example will show you how to properly solder a “Female” XLR connector (a microphone cable consists of a “Male XLR” and a “Female XLR” connector) – only the “Female” XLR will be covered in this example (see above picture).
Check out the Video Clip…
How to Solder a Female XLR Video Clip – Click Here!
 |
CHECK OUT OUR NEW “TECHNICAL” PUBLICATIONS NOW! |
 |
Let’s get started!
1. Clear the work area: Make sure that the area you are soldering around is clear and free of any debris (it is always recommended to solder in a clean and “clutter free” area).
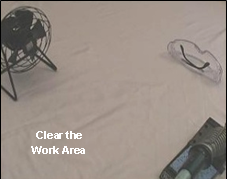
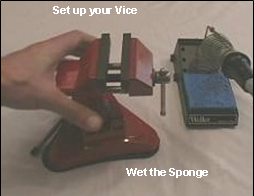
2. Turn on the soldering iron, and your small fan: Since it will take a few minutes for the iron to heat up, turn it on now (so you can start on other things while the iron is heating up), and wet the soldering sponge.
3. Set up your Vice: If you want to solder correctly you should use a Vice, this tool will make soldering easier and smoother for you – the vice acts like another pair of hands (firmly holding your connectors in place).
4. Ready the Solder: Place the solder in a position where it can be easily manipulated (keep a piece of solder sticking up in the air so you can access the solder anytime you need it.
5. Put on your Safety Glasses Now: Put on your safety glasses now – since the next step will involve soldering. Some techs end up not wearing their safety glasses because they can be uncomfortable, but this is just an poor excuse (especially when you could easily buy a comfortable pair and protect yourself properly) – safety must be a high priority when soldering.
6. Prepare the Cable and Connectors: The preparation of the cable and connectors go hand in hand (so they are combined in this step).
a) Determine the cable length you need – roll the cable up slightly.
b) Take the XLR connector apart (loosen the screws slightly).
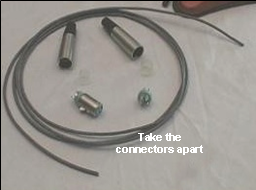
c) Place the connector shell and inner sleeve on each end of the cable – Do not skip this step or you will have to un-solder your connections to get the shell and inner sleeve on later.
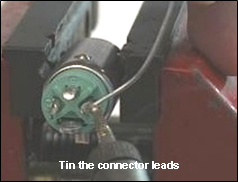
d) Place the “female” connector in the vice (we are only using the female XLR connector in this example), be careful not to over tighten the vice on the connector.
e) Tin the connector leads (see “What is Tinning” under our Basic Soldering section).
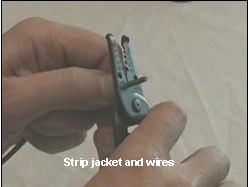
f) Prepare one of the cable ends by stripping the cable jacket back, and then stripping the wire to the pre-determined lengths (size the wire up to the connector).
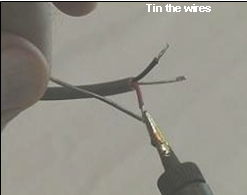
g) Tin the wires on the end of the cable (twist the wire strands together if needed).
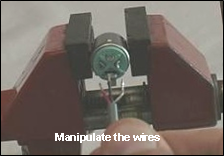
7. Soldering: It’s now time to solder the wires to the connector. First “manipulate” the 3 wires so that they line up with the connector leads. Then with the female XLR connector firmly in the vice, hold the end of the cable and solder the “black” wire onto the #3 (middle connection – as shown), then the “red” wire on to the #2 connection, and finally the “shield” wire onto the #1 connection. Pin configuration for XLR’s is Pin 1 = Shield, Pin 2 = Hot, and Pin 3 = Common.
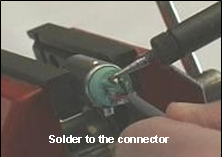
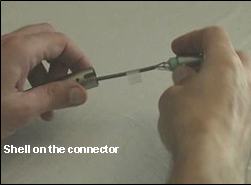
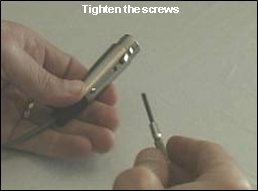
8. Once you finish the soldering to the connector, slide the connector shell and inner sleeve up the wire and connect both ends together (when pulling on the cable, pull gently, just enough to work the wire through). With the connector all together, take your small screwdriver (tweeker) and tighten the screws (as shown, be careful not to over tighten).
WARNING: The actual heating time (the length of time the iron is heating the solder) should be very short – leaving the iron on the wires any longer than a few seconds may melt the wires together (the wires can melt inside the jacket where you cannot see the damage), causing the cable to be defective.
Other Connectors – Soldering Basics
How to Make a 1/4″ Mono Connector (Phone Plug / Guitar Cable) – Video Clip!
Solder a TRS Stereo Connector – Video Clip!
How to Make a 3.5mm (mini plug, used for headphones, ipod, etc) – Video Clip!
All finished:
How to Solder an XLR – Now that you have completed one end of the cable it’s time to solder a connector to the other end of the cable – follow the same steps as performed above, but this time you will be soldering a “Male” XLR connector. When you are all finished – Check the cable and connectors, then wrap the cable (as shown under our Basics of Audio Cables Menu Section – Click Here! Although XLR connectors are used mainly for microphone cables, they are also used for many “Balanced” connections found on audio processing equipment (such as compressors, equalizers, etc). Also called “cannon” plug.
Safety must be made a priority whenever you solder – AVCSS cannot be held responsible or liable for any injuries incurred from any soldering method or technique shown on this website.
Always use Caution!
